Red velvet cake, it’s like biting into a cloud made of dreams—who knew a cake could feel like a warm hug on a rainy day? I stumbled onto this recipe one sleepless night while scrolling through a maze of cake photos, each more tantalizing than the last. The result? A cake that’s not just moist but almost scandalously decadent, with a hint of cocoa that teases your taste buds just right.
Steps
- Preheat your oven to 350°F (177°C). Grease two 9-inch cake pans, line them with parchment paper, and grease the parchment to ensure easy release.
- In a large bowl, whisk together the cake flour, baking soda, cocoa powder, and salt. Set this dry mixture aside.
- Using a mixer, beat the softened butter and sugar on medium-high speed until well combined, about one minute. Add the oil, egg yolks, vanilla extract, and vinegar, and beat on high speed for two minutes.
- With the mixer on low, gradually add the dry ingredients to the wet mixture, alternating with the buttermilk. Add the food coloring until the desired red shade is achieved.
- In a separate bowl, whip the egg whites on high speed until fluffy peaks form, approximately three minutes. Gently fold these whipped egg whites into the cake batter for a silky texture.
- Divide the batter evenly between the prepared cake pans. Bake for 30-32 minutes, or until a toothpick inserted in the center comes out clean. Let the cakes cool completely in the pans on a wire rack.
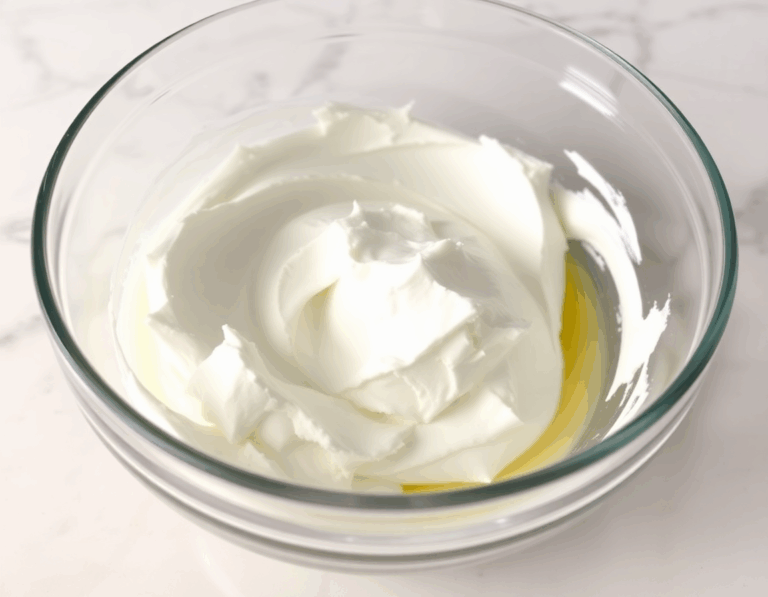
- For the frosting, beat the cream cheese and butter on medium-high speed until smooth. Gradually add confectioners’ sugar, vanilla extract, and a pinch of salt, beating until creamy. Adjust the consistency with more sugar or a pinch of salt as needed.
- Trim the tops of the cooled cakes to create a flat surface. Place one layer on a serving plate, cover with frosting, then add the second layer and frost the top and sides. Use a piping tip for decoration if desired.
- Chill the assembled cake for at least 30-60 minutes before slicing to help it hold its shape. Store leftover cake in the refrigerator for up to five days.
Ingredients
- 3 cups (360g) cake flour, spooned and leveled
- 1 teaspoon baking soda
- 2 tablespoons (10g) unsweetened natural cocoa powder
- 1/2 teaspoon salt
- 1/2 cup (113g) unsalted butter, softened to room temperature
- 2 cups (400g) granulated sugar
- 1 cup (240ml) canola or vegetable oil
- 4 large eggs, at room temperature, separated
- 1 tablespoon pure vanilla extract
- 1 teaspoon distilled white vinegar
- Red food coloring (liquid or gel)
- 1 cup (240ml) buttermilk, at room temperature
- 16 ounces (452g) full-fat brick cream cheese, softened to room temperature
- 3/4 cup (170g) unsalted butter, softened to room temperature
- 5 cups (600g) confectioners’ sugar
- 1 1/2 teaspoons pure vanilla extract
- Pinch of salt, to taste
FAQ
- What is the flavor profile of red velvet cake?
- Red velvet cake is a delightful blend of mild cocoa, tangy buttermilk, sweet vanilla, and a rich buttery flavor. These elements combine to give the cake its unique and memorable taste.
- Why is buttermilk important in red velvet cake?
- Buttermilk is crucial because it adds a tangy flavor and makes the cake incredibly moist. It also helps to activate the baking soda, which is essential for the cake’s rise.
- Can I make red velvet cake without food coloring?
- Absolutely! While food coloring gives red velvet cake its signature hue, you can omit it entirely for a cocoa-colored cake with the same delicious flavor. Alternatively, natural options like beet powder can be used for coloring.
- What is the purpose of whipping egg whites separately in the recipe?
- Whipping egg whites separately and folding them into the batter introduces air, creating a cake with a light and velvety texture. This technique is a key factor in achieving the perfect red velvet crumb.
- How should I store leftover red velvet cake?
- Leftover cake should be covered tightly and stored in the refrigerator for up to five days. Both frosted and unfrosted cake layers can be frozen for 2-3 months; just thaw them overnight in the fridge before serving.
Tips
- Use Cake Flour for Best Texture: Opt for cake flour instead of all-purpose flour to achieve a light and soft crumb, akin to professional bakery cakes. If you can’t find cake flour, you can make a substitute at home.
- Balance Butter and Oil: Incorporate both butter and oil in the batter. This combination ensures the cake remains moist and retains a rich buttery flavor.
- Whip Egg Whites Separately: Beat egg whites until fluffy peaks form and fold them into the batter at the end. This step introduces air into the mixture, resulting in a velvety and light cake texture.
- Chill Cream Cheese Frosting for Piping: If you plan to pipe decorations with the cream cheese frosting, refrigerate it for about 20 minutes first. This helps the frosting hold its shape better during decoration.
Equipment
- Electric Mixer (Handheld or Stand) – Essential for beating the butter and sugar, as well as the egg whites.
- 9-inch Round Cake Pans – Needed for baking the cake layers.
- Parchment Paper Rounds – Helps in releasing the cakes from the pans seamlessly.
- Silicone Spatula – Useful for scraping down the sides of the bowl and folding in ingredients.
- Icing Spatula – For spreading the frosting evenly over the cake.
- Bench Scraper – Useful for smoothing the sides of the cake.
- Wilton Piping Tip #12 – For decorating the cake with frosting.
- Piping Bag (Reusable or Disposable) – Used for piping decorations onto the cake.
- Cake Carrier – For storing the cake after it is assembled.
- Gel Food Coloring – To achieve the classic red color of red velvet cake.